How to Create a QR Code Menu in Minutes
Learn how to create a QR code menu for your restaurant in just a few minutes with TableQRCode.com for Free
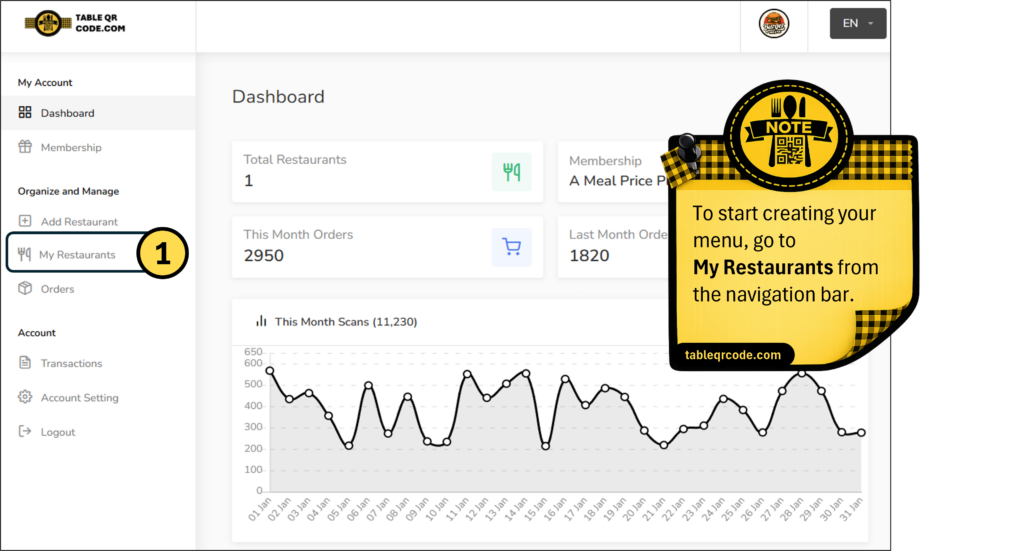
Step 1: Create Your Free Account
To start creating your QR menu, first create a free account at Table QR Code. After signing up and logging in, you will see Dashboard as your first screen. From the navigation bar, go to My Restaurants to start creating and managing your digital menu.
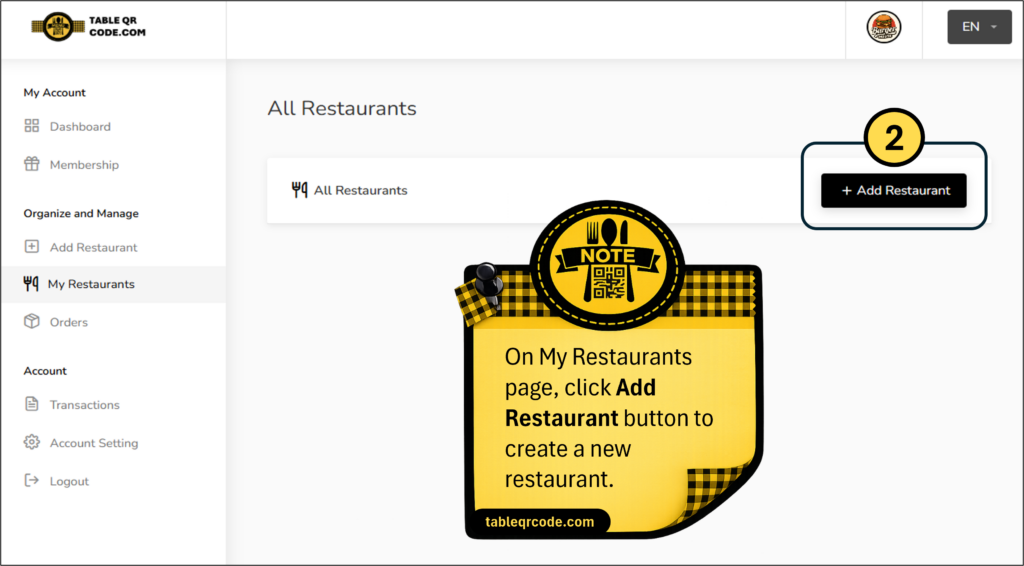
Step 2: Add a New Restaurant
On the My Restaurants page, click the Add Restaurant button to create a new restaurant and start building your QR digital menu.
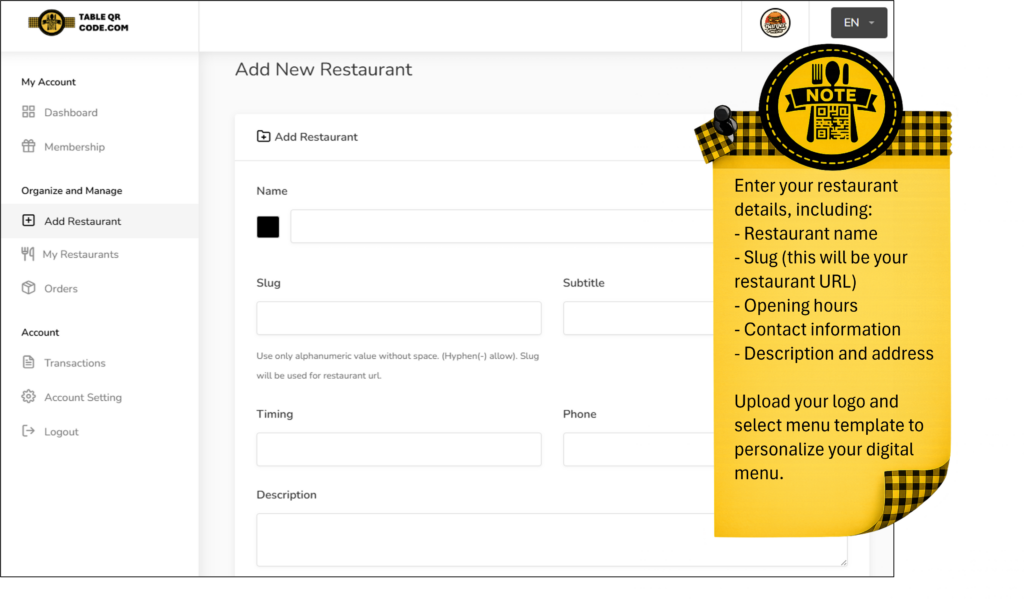
Step 3: Enter Restaurant Details
Enter your restaurant details such as name, URL slug, opening hours, contact information, description, and address. Upload your logo and choose a menu template to personalize your QR digital menu.
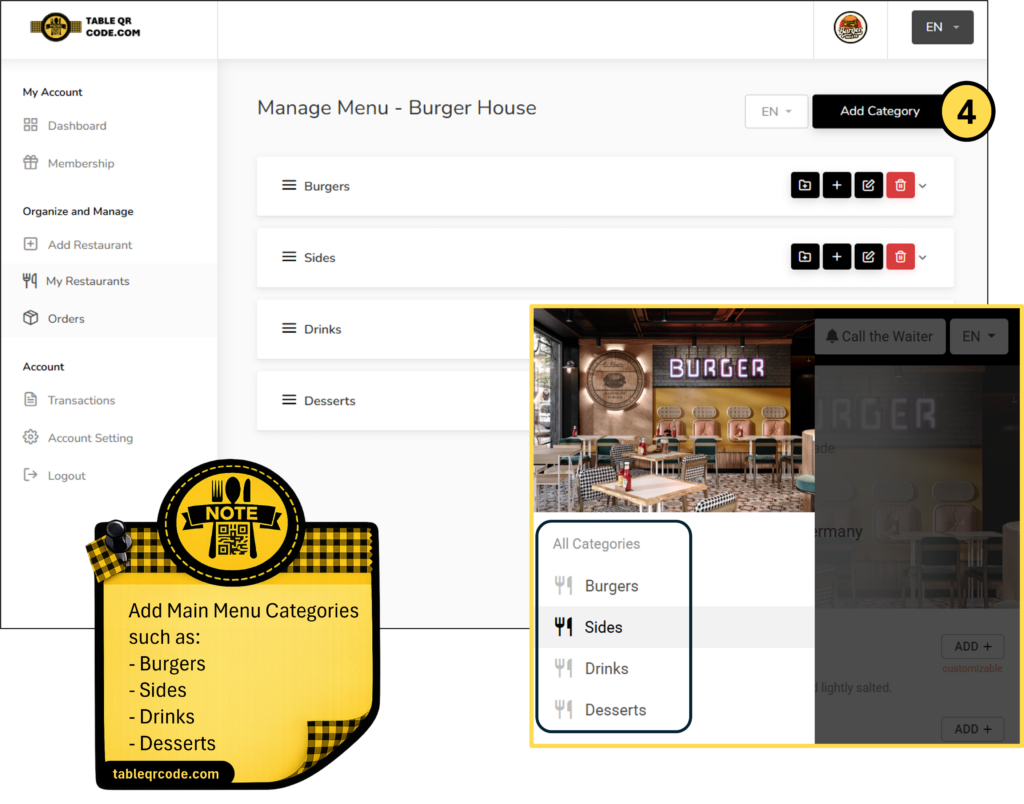
Step 4: Add Menu Categories
Add main menu categories such as Burgers, Sides, Drinks, and Desserts to organize your digital menu. Click Add Category to start building your menu structure.
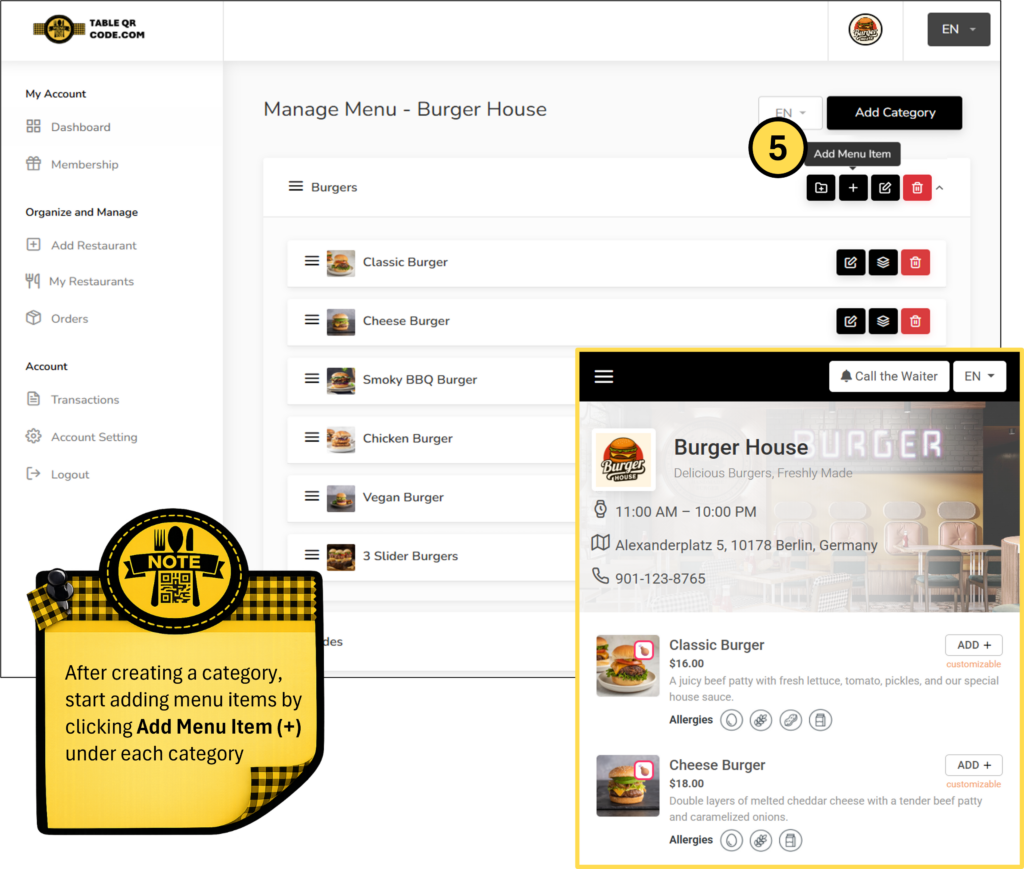
Step 5: Add Menu Items
Add menu items under each category. Enter item details such as name, description, price, and image to complete your QR digital menu.
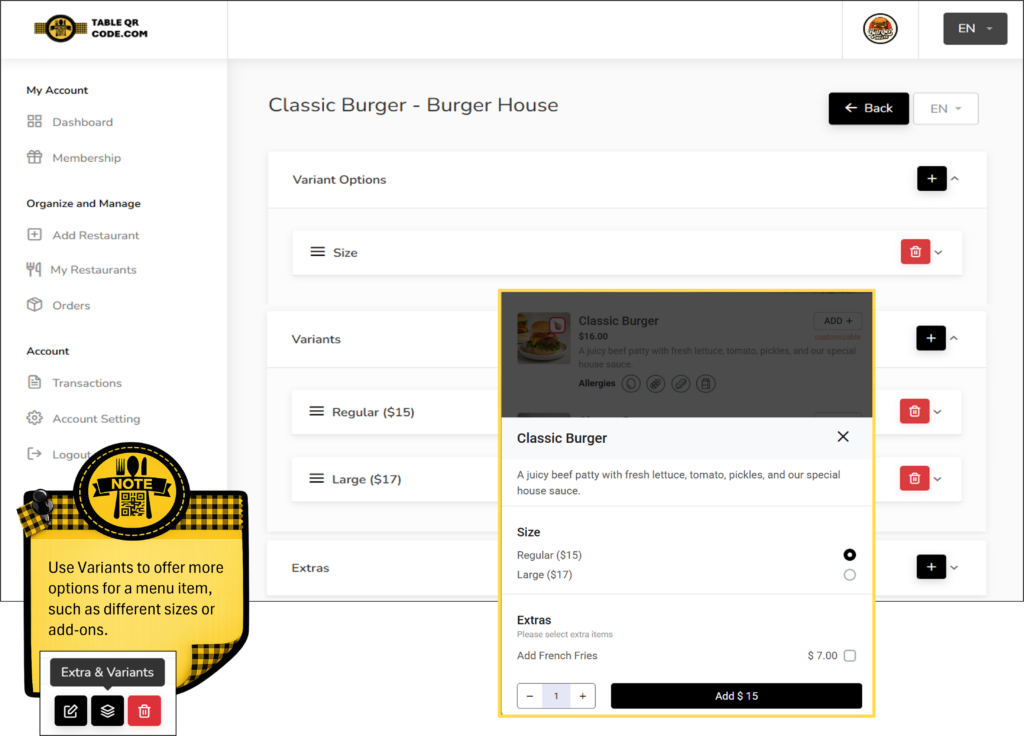
Step 6: Add Variants & Extras
Use variants and extras to offer more options for each menu item, such as different sizes, prices, or add-ons. This helps you create a flexible and fully customizable QR digital menu.